
To turn on the Finch, press and hold the power button on the bottom of the Finch until one or more of the LEDs in the tail turn on. This takes about 2 seconds. Three letters should now be flashing on the micro:bit.
To turn off the Finch, hold down the power button until the beak turns red. The Finch will turn itself off to save battery power if it is inactive for 10 minutes without connecting to Bluetooth, or for 20 minutes while connected to Bluetooth. When turning off, the Finch will play a disconnecting sound and the beak LED will be red.
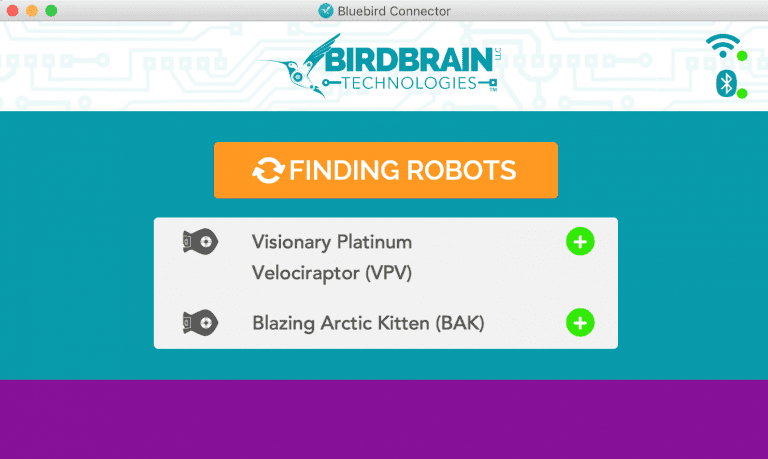
Start by installing the BlueBird Connector.
Windows device - Insert the BLE Bluetooth dongle into your computer.
Mac device - Skip this step.
Open the BlueBird Connector. It will begin finding the robots around you. Click on the name of your robot. Each robot is flashing its initials on the micro:bit to help you figure out which is which.
When you connect to your Finch, you will hear a series of tones, and the robot will show up in the purple “CONNECTED” section of the BlueBird Connector. Leave it open the entire time that you are using the Finch. If at any point you have trouble with your robot, you should come back to the BlueBird Connector, check your Bluetooth connection, and reconnect if necessary.
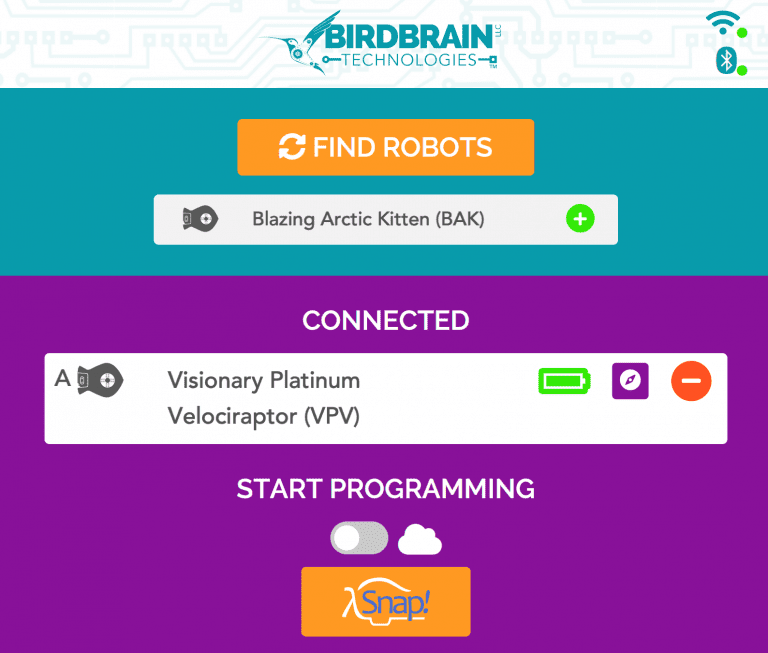
To use Snap! to program the Finch, click the orange Snap button in the BlueBird Connector. Snap! will open with the Finch blocks loaded.
You can use Snap! online or offline. To use Snap! online with the Finch, make sure that the cloud is selected and then open Snap!. To make the Finch run the program, just click on the programming blocks!
Click here for more information on how to save your files in Snap!
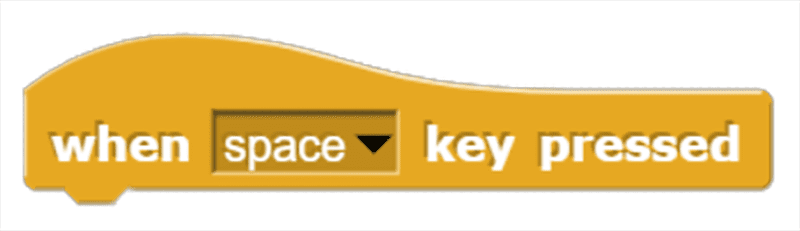
Some Control blocks are designed to work with events that are only true or false, like the when __ key pressed block, located in the gold Control menu.
Click here to learn more about programming in Snap!
To use the Python programming language with the Finch, you need to install Python onto your computer. You can use any offline Python editor. IDLE, an editor that is installed on your computer with Python, is recommended. Notepad++ works fine too!
Download the BirdBrain Python library here. The BirdBrain Python folder contains the main library (BirdBrain.py) and a test file (FinchTest.py). To test that everything is working properly, run FinchTest.py in IDLE, using Run/Run Module. The Finch’s beak should blink 10 times.
Make sure to store your programs in the BirdBrainPython folder so that they can find the Finch library (BirdBrain.py). If you wish to store programs in a different folder, just make a copy of BirdBrain.py and move it to the desired folder.
Importing the Finch Library and Declaring a Finch
To use the Finch in Python, you must import the Finch class from the BirdBrain library. A library in Python is a collection of Python code that you can use in your program, and the Finch class contains the methods that you will use to write programs that use the Finch.

Next, declare an object that represents the Finch. This line of code gives your Finch a name, in this case “bird,” and tells the program that it is the Finch.

These 2 lines of code MUST appear at the start of any Python program for the program to work properly with the Finch. The guides on this page assume that you have already included these 2 lines in your code. Click here to learn more about programming the Finch in Python.
Comments:
You can use the # sign to add comments to your program. Comments do not affect how your program works, but they make it easier for other people to use your code (and for you to remember what it does).
